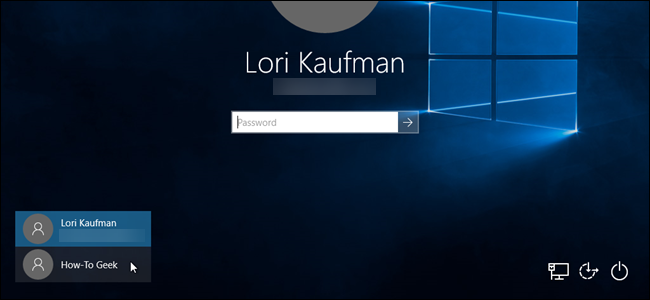
If you have multiple user accounts on your computer, you might find it annoying to have to click on the icon for your username each time you start up the computer. To remedy this problem, you can hide a user account with a registry hack cash advance.
If you aren’t the only actual active user on the system, then you shouldn’t really hide the other user accounts, although you could set your main account to logon automatically and then use the Switch User function only when necessary.
This tweak is most useful for when you have extra user accounts set up for file sharing or other purposes.
Standard warning: The Registry Editor is a powerful tool and misusing it can render your system unstable or even inoperable. This is a pretty simple hack and as long as you stick to the instructions, you shouldn’t have any problems. That said, if you’ve never worked with it before, consider reading about how to use the Registry Editor before you get started. And definitely back up the Registry (and your computer!) before making changes.
Before changing the registry, we’ll check the exact name of the user(s) we want to hide. A quick way to do this is to press Windows+R on your keyboard and enter
netplwiz in the Open box. Then, click “OK”.
On the User Accounts dialog box, make sure the Users tab is active. Look in the “Users for this computer” list and note the exact name of the user(s) you want to hide. Click or “Cancel” to close the dialog box since you’re not making any changes here.
NOTE: The way you can tell whether an account in the Users for this computer list is a local account is that local accounts are listed by the name you gave the account when you created it. Microsoft accounts are listed by the email address of the account.

Now that you know the name of the user(s) you want to hide, we’ll tweak the registry to hide them. Open the Registry Editor by clicking on Start and typing
regedit . Press Enter to open Registry Editor, or click on regedit under Best match.
In the Registry Editor, use the left sidebar to navigate to the following key:
HKEY_LOCAL_MACHINE\SOFTWARE\Microsoft\Windows NT\CurrentVersion\WinlogonCreate a new key under the Winlogon key by right-clicking on the Winlogon key and then selecting New > Key from the popup menu.
Name the new key “SpecialAccounts”.

Next, we’ll create a another new key, this time under the newly created
SpecialAccounts key. Right-click on the SpecialAccounts key and select New > Key again.
Name this key “UserList”.

Now, we’re going to create a new value inside the
UserList key. Select the UserList key, right-click in the right pane, and choose New > DWORD (32-bit) Value.
Give this value the name of the user account that you want to hide, and then create a new DWORD (32-bit) Value for each additional user account you want to hide.

For each value you create, make sure the Data value is zero (0).

If, for some reason, the Data value is not zero, double click on the value name in the right pane and enter 0 in the Value data box on the Edit DWORD (32-bit) Value dialog box. Click “OK”.

Go to File > Exit to close the Registry Editor.

Log out of your Windows account by opening the Start menu, clicking on your user name in the upper-left corner, and selecting “Sign out”.

Now, there are no other users listed in the lower-left corner of the logon screen.

NOTE: Make sure not to hide your last administrator account using this tweak, or you won’t be able to log in as an administrator anymore.
At this point, the user account should be completely hidden from everywhere. If you want to show the account again, open the registry editor and change the value for the user name on the right that you want to show again to 1. If you want to show all the user accounts on the logon screen again, you can simply delete the SpecialAccounts key. The UserList key and all the user name values you added as values inside the UserList key are also deleted.
Note that if you hide a user account using this registry hack, you won’t even be able to use the Switch User menu on the Start menu to get to that user account, and the account will also be hidden from the UAC dialog prompt, the Control Panel, and even from the Settings app.
If you’re trying to decide whether you want an account to be a Microsoft account or a local one, here’s a list of all the features that require a Microsoft account on Windows 10, so you can decide whether you need access to these features. We’ve also discussed how to set up and configure user accounts on Windows 10.
EmoticonEmoticon