On Windows 8 and 10, Windows finally offers a built-in way to mount ISO disc image files. If you’re using Windows 7, you’ll need a third-party tool.
Mounting an ISO Image in Windows 8, 8.1 or 10
On Windows 8 and 10, Windows has the built-in ability to mount both ISO disc image and VHD virtual hard drive image files. You have three options. You can:
- Double-click an ISO file to mount it. This won’t work if you have ISO files associated with another program on your system.
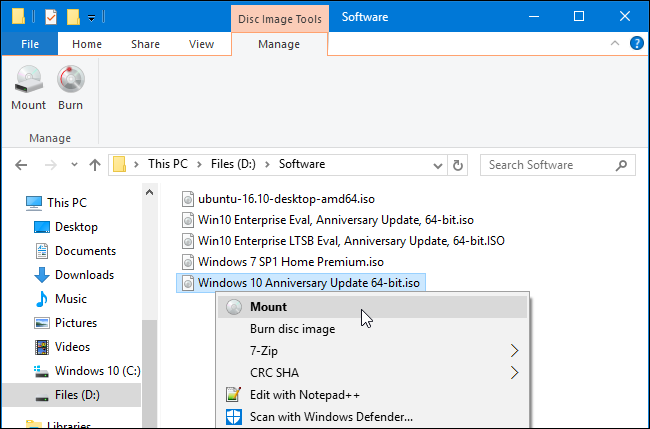
- Right-click an ISO file and select the “Mount” option.
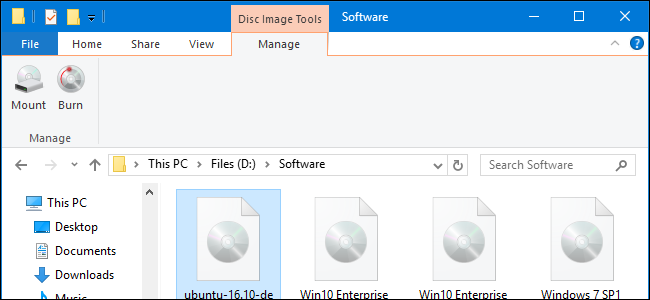
- Select the file in File Explorer and and click the “Mount” button under the “Disk Image Tools” tab on the ribbon.
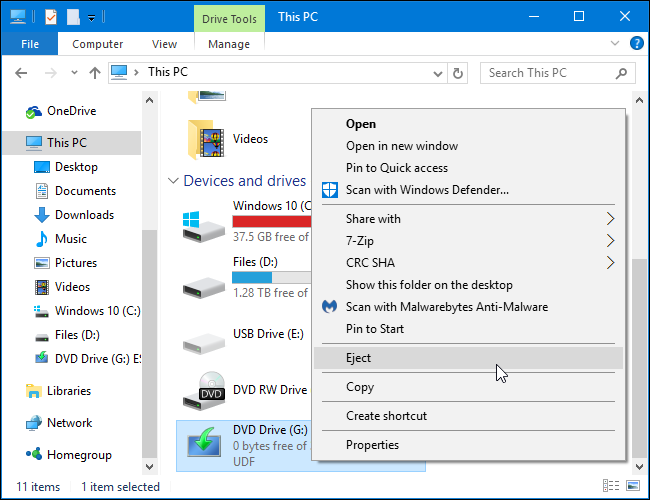
Once you’ve mounted the disc image, you’ll see it appear as a new drive under This PC. Right-click the drive and select “Eject” to unmount the ISO file when you’re done.
Mounting an ISO Image in Windows 7 or Vista
On older versions of Windows, you’ll need a third-party application to mount ISO image files. We like WinCDEmu, a simple and open-source disc mounting program. It supports ISO files and other disc image formats.
WinCDEmu is even useful on Windows 8 and 10, where it will allow you to mount the BIN/CUE, NRG, MDS/MDF, CCD, and IMG image files that Windows still doesn’t offer built-in support for.
Install WinCDEmu and give it permission to install the hardware driver it requires. After you do, just double-click a disc image file to mount it. You can also right-click a disc image file and click “Select drive letter & mount” in the context menu.

You’ll see a simple interface for choosing the drive letter and other basic options. Click “OK” and the mounted image will appear under Computer. To unmount the disc image when you’re done, right-click the virtual disc drive and select “Eject”.

EmoticonEmoticon